Android MVVM with factory example Kotlin 2023
Hi, Android developer in this Android Kotlin article we are learning about the Android MVVM used with the factory. So I Create a sample project showing the items in the recycler view list. So Let’s start to make an Android MVVM with the factory example Kotlin.
What exactly is the Android MVVM ViewModel Factory?
Table of Contents
Implementations of the ViewModel Provider factories are accountable for creating ViewModels. This means you create your own performance for making an instance of the ViewModel.
Let’s make our own version of the ViewModel Provider Factory in the form below
Below are some suggestions to keep in mind.
- You can pass all of your ViewModel parameters to ViewModel Provider Factory via a constructor or another pattern you like (Singleton, FactoryPattern, etc. ). And it is because you cannot call the ViewModel constructor in Activity or Fragment when you initialize ViewModel and want to set the ViewModel constructor’s argument value so that’s why you need to pass the argument value to ViewModelProvider.Factory and it will create your ViewModel.
- ViewModelProvider Factory is an interface that needs to be created as the method. The Create function is accountable for creating the VMWModel instance.
- The model class.getConstructor(Int::class.java) gets the constructor which has type Int and creates an instance of ViewModel by calling the newInstance method and passing constructor values to this method.
What is the reason we require ViewModel Provider Factory?
There are a few questions that come to mind. I won’t give value to the constructor for ViewModel. I’ll design an option to set my values, which should perform perfectly, so why would I require the ViewModelProvider Factory? Somehow you are correct, but you will require ViewModel Prover Factory in certain situations.
What is the best time to make use of the ViewModel Provider Factory?
If your ViewModel contains dependencies, you have to put the dependencies in your constructor (It is the most effective method to pass your dependencies) This is how you can mock the dependencies and later verify your ViewModel.
When to not make use of ViewModel Provider Factory
If your ViewModel has no dependencies then you will not require to create your own ViewModelProvider.Factory. The default implementation will suffice to create the ViewModel that you need.
Android MVVM with factory example Kotlin
Start your Android studio and create a new project and sync the project. And add the below dependency in your project base Gradle. build.
Step 1: Dependencies
dependencies {

    implementation 'androidx.core:core-ktx:1.7.0'
    implementation 'androidx.appcompat:appcompat:1.5.1'
    implementation 'com.google.android.material:material:1.7.0'
    implementation 'androidx.constraintlayout:constraintlayout:2.1.4'
    testImplementation 'junit:junit:4.13.2'
    androidTestImplementation 'androidx.test.ext:junit:1.1.3'
    androidTestImplementation 'androidx.test.espresso:espresso-core:3.4.0'

    implementation 'com.squareup.retrofit2:retrofit:2.9.0'
    implementation'com.squareup.retrofit2:converter-gson:2.9.0'


    // ViewModel
    implementation 'androidx.lifecycle:lifecycle-viewmodel-ktx:2.5.1'
    // LiveData
    implementation 'androidx.lifecycle:lifecycle-livedata-ktx:2.5.1'
    implementation "androidx.core:core-ktx:+"
    implementation "org.jetbrains.kotlin:kotlin-stdlib-jdk7:$kotlin_version"
}
Step 2: Create a Folder in your project for Android MVVM Pattern
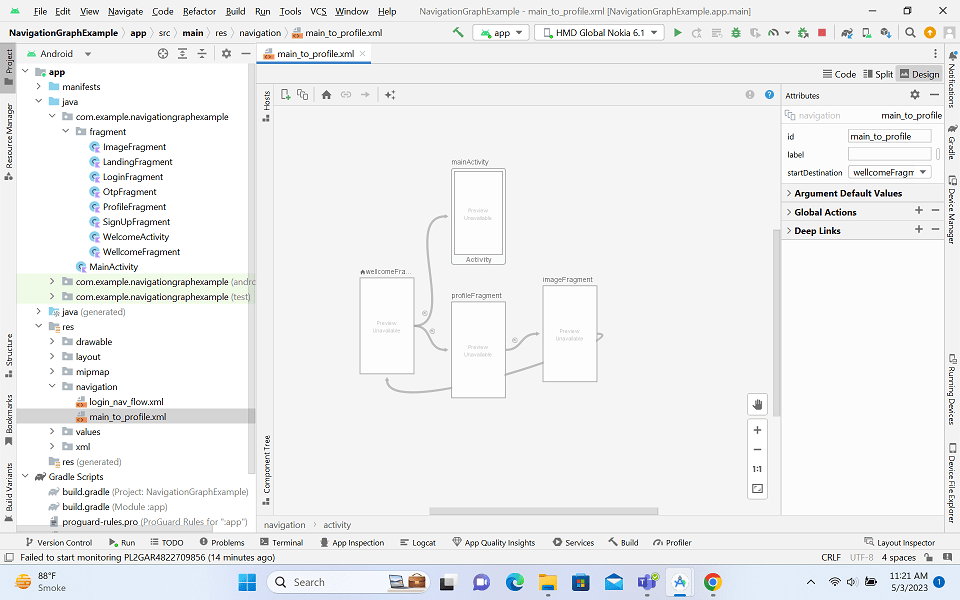
Create a separate folder for all the Adapter class, Network, model class, Reposotery, and ViewModel see I Image below. Android MVVM with factory example Kotlin.
Step 3 Create an Adapter Call with the name PostAdapter
package com.example.mvvmfactoryandrecycler.Adaptor

import android.view.LayoutInflater
import android.view.ViewGroup
import androidx.recyclerview.widget.RecyclerView
import com.example.mvvmfactoryandrecycler.Models.PostResponse
import com.example.mvvmfactoryandrecycler.databinding.PostRowBinding

class PostAdapter(var list:List<PostResponse>) : RecyclerView.Adapter<PostAdapter.PostViewHolder>() {

    inner class PostViewHolder(val binding:PostRowBinding) : RecyclerView.ViewHolder(binding.root)

    override fun onCreateViewHolder(parent: ViewGroup, viewType: Int): PostViewHolder {
        val binding = PostRowBinding.inflate(LayoutInflater.from(parent.context))
        return PostViewHolder(binding)
    }

    override fun onBindViewHolder(holder: PostViewHolder, position: Int) {
        holder.binding.tvBody.text = list[position].title
        holder.binding.tvTitle.text = list[position].body
    }

    override fun getItemCount(): Int {
        return list.size
    }
}
Step 4: In Model Create a Model class PostResponse
package com.example.mvvmfactoryandrecycler.Models

data class PostResponse(
    var userId:Int,
    var id:Int,
    var title:String,
    var body:String
)
Step 5: In the Network create an Interface class API
package com.example.mvvmfactoryandrecycler.Network

import com.example.mvvmfactoryandrecycler.Models.PostResponse
import retrofit2.Call
import retrofit2.http.GET

interface Api {

    @GET("/posts")
    fun getPosts(): Call<List<PostResponse>>
}
Step 6: In the Network create an Object class RetroInstance
package com.example.mvvmfactoryandrecycler.Network

import retrofit2.Retrofit
import retrofit2.converter.gson.GsonConverterFactory

object RetroInstance {
    private val BASE_URL = "https://jsonplaceholder.typicode.com"

    fun getPosts(): Retrofit {
        return Retrofit.Builder()
            .addConverterFactory(GsonConverterFactory.create())
            .baseUrl(BASE_URL)
            .build()
    }
}
Step 7: In Reposotery folder make a class PostRepo
package com.example.mvvmfactoryandrecycler.Reposotery

import androidx.lifecycle.LiveData
import androidx.lifecycle.MutableLiveData
import com.example.mvvmfactoryandrecycler.Models.PostResponse
import com.example.mvvmfactoryandrecycler.Network.Api
import com.example.mvvmfactoryandrecycler.Network.RetroInstance
import retrofit2.Call
import retrofit2.Callback
import retrofit2.Response

class PostRepo(private var retro:RetroInstance) {

    private var mutableList = MutableLiveData<List<PostResponse>>()

    val list :LiveData<List<PostResponse>>
    get() = mutableList

    fun postMethodCall(){
        var call = retro.getPosts().create(Api::class.java)

        call.getPosts().enqueue(object :Callback<List<PostResponse>>{
            override fun onResponse(
                call: Call<List<PostResponse>>,
                response: Response<List<PostResponse>>
            ) {
                mutableList.postValue(response.body())
            }

            override fun onFailure(call: Call<List<PostResponse>>, t: Throwable) {
            }

        })
    }
}
Step 8: In ViewModel make a class with the name PostViewModel
package com.example.mvvmfactoryandrecycler.ViewModel

import androidx.lifecycle.LiveData
import androidx.lifecycle.ViewModel
import com.example.mvvmfactoryandrecycler.Models.PostResponse
import com.example.mvvmfactoryandrecycler.Reposotery.PostRepo

class PostViewModel(private val repo :PostRepo):ViewModel() {

    fun repoCall(){
        repo.postMethodCall()
    }

    val list :LiveData<List<PostResponse>>
    get() = repo.list
}
Step 9: Create a Kotlin class PostViewModelFactory
class PostViewModelFactory(private val repo: PostRepo) : ViewModelProvider.Factory {
    override fun <T : ViewModel> create(modelClass: Class<T>): T {
        return PostViewModel(repo) as T
    }
}
After completing the above step you can open your main_activity.XML class and the recycler view layout In your XML.
Step 10: activity_main.xml
<?xml version="1.0" encoding="utf-8"?>
<androidx.constraintlayout.widget.ConstraintLayout xmlns:android="http://schemas.android.com/apk/res/android"
    xmlns:app="http://schemas.android.com/apk/res-auto"
    xmlns:tools="http://schemas.android.com/tools"
    android:layout_width="match_parent"
    android:layout_height="match_parent"
    tools:context=".MainActivity">


    <androidx.recyclerview.widget.RecyclerView
        android:id="@+id/recyclerView"
        android:layout_width="match_parent"
        android:layout_height="match_parent"/>

</androidx.constraintlayout.widget.ConstraintLayout>
Step 11: Create Recyclerview item View XML class.
<?xml version="1.0" encoding="utf-8"?>
<androidx.constraintlayout.widget.ConstraintLayout
    xmlns:android="http://schemas.android.com/apk/res/android"
    android:layout_width="match_parent"
    android:layout_height="wrap_content"
    xmlns:app="http://schemas.android.com/apk/res-auto"
    android:padding="10dp"
    android:layout_margin="10dp">

    <androidx.appcompat.widget.AppCompatTextView
        android:id="@+id/tvTitle"
        android:layout_width="match_parent"
        android:layout_height="wrap_content"
        style="@style/TextAppearance.Material3.BodyLarge"
        app:layout_constraintTop_toTopOf="parent"
        app:layout_constraintStart_toStartOf="parent"
        app:layout_constraintEnd_toEndOf="parent"/>

    <androidx.appcompat.widget.AppCompatTextView
        android:id="@+id/tvBody"
        android:layout_width="match_parent"
        android:layout_height="wrap_content"

        app:layout_constraintTop_toBottomOf="@+id/tvTitle"
        app:layout_constraintStart_toStartOf="parent"
        app:layout_constraintEnd_toEndOf="parent"/>

</androidx.constraintlayout.widget.ConstraintLayout>
Step 12: MainActivity.kt file Implementation
package com.example.mvvmfactoryandrecycler

import androidx.appcompat.app.AppCompatActivity
import android.os.Bundle
import android.util.Log
import androidx.lifecycle.ViewModelProvider
import androidx.recyclerview.widget.LinearLayoutManager
import com.example.mvvmfactoryandrecycler.Adaptor.PostAdapter
import com.example.mvvmfactoryandrecycler.Network.RetroInstance
import com.example.mvvmfactoryandrecycler.Reposotery.PostRepo
import com.example.mvvmfactoryandrecycler.ViewModel.PostViewModel
import com.example.mvvmfactoryandrecycler.databinding.ActivityMainBinding

class MainActivity : AppCompatActivity() {
    lateinit var binding: ActivityMainBinding
    lateinit var viewModel: PostViewModel
    override fun onCreate(savedInstanceState: Bundle?) {
        super.onCreate(savedInstanceState)
        binding = ActivityMainBinding.inflate(layoutInflater)
        setContentView(binding.root)

        val retro = RetroInstance
        val repo = PostRepo(retro)

        viewModel = ViewModelProvider(this,PostViewModelFactory(repo))[PostViewModel::class.java]

        viewModel.repoCall()
        viewModel.list.observe(this@MainActivity){
            binding.recyclerView.adapter = PostAdapter(it)
            binding.recyclerView.layoutManager = LinearLayoutManager(this)

            Log.d("TAG", "onCreate: $it")
        }

    }
}
now you can run your Android MVVM project and see the output. and follow the steps to use the Android MVVM pattern in your project. Android MVVM with factory example Kotlin full source code also find on Codeplayon Git Hub.
Create By: Ruhil (Jr. Android developer )
Read More:-
- Codeplayon Jetpack Compose Tutorial
- Codeplayon Android Tutorial
- Codeplayon Flutter Tutorial
- Codeplayon on Github


