
Dagger hilt android tutorial – dagger hilt kotlin. When working on Android projects, there are many dependencies that we must integrate. To manage these dependencies, we use Dagger, a dependency injection framework.
Dagger is not an easy task to set up and use. It requires extensive boilerplate code and a steep learning curve. It’s the Dagger version without Android support. Dagger-Android was created, which reduced boilerplate code but wasn’t successful.
Dagger hilt android tutorial
Google recommends Dagger Hilt as the Jetpack library’s recommended way to use it. It is said to be very helpful.
- To make the dagger-code simple and easy for developers.
- Different build types may require a different set or bindings.
- You can just care about where to inject dependencies, and then rest all of the code generation happens by dagger by using annotations. This will remove all the boilerplate code.
This tutorial will teach you:
- Understanding Dagger
- Initiating a new project
- Project Structure
- Integrating Dagger Hilt
- WorkManager with Dagger Hilt
- Qualifiers
Let’s get started.
Understanding Dagger
Dagger-Hilt is not complete without an understanding of Dagger basics. This section will explain the Dagger’s terminologies.
We need to be able to comprehend the four major annotations in order to fully understand Dagger.
- Module
- Component
- Providers
- Inject
It is easy to understand the concept by thinking of module as a provider and an activity or other class as a customer. To provide dependency from provider-to-consumer, we need a bridge. Dagger, Component work is that bridge.
A module is a class. We annotate it using @ModuleforDagger to make it Module.
An interface component is an interface that is annotated @Component. It can take modules. This annotation is no longer required in Dagger–Hilt.
Provides are an annotation that is used in Module Class to provide dependency and.
An annotation called Inject that can be used to identify a dependency within the consumer is called “Inject”.
Before you move to Dagger Hilt android, it is highly recommended that you learn about raw Dagger.
Initiating a new project
We will be setting up the Android Project.
Create an Project
- Start a new Android Studio Project
- Choose Empty Activity, Next
- Name: Dagger-Hilt-Tutorial
- Package name: com.mindorks.framework.mvvm
- Language: Kotlin
- Finish
- Start your project now
Add dependencies
These dependencies should be added to the app’s build.gradle.
implementation "androidx.recyclerview:recyclerview:latest-version"
implementation 'android.arch.lifecycle:extensions:latest-version'
 implementation 'com.github.bumptech.glide:glide:latest-version'
 implementation 'androidx.activity:activity-ktx:latest-version'
Our project now has all the dependencies.
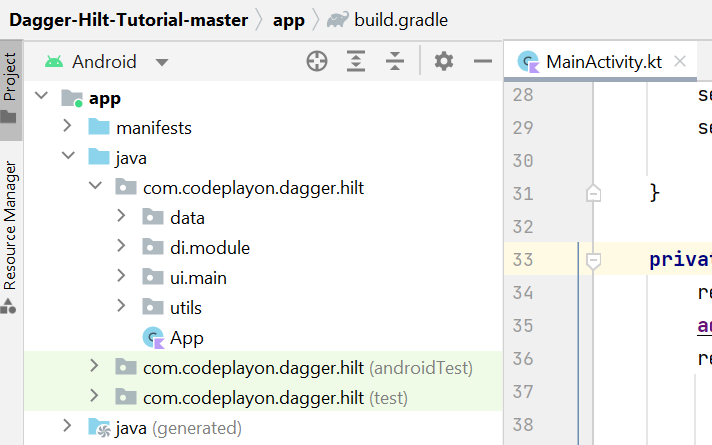
Project Architecture
We will use a basic version MVVM for the project. The package will look as follows:
We require the enum in order to symbolize that of the UI State. We’ll create it within our utils module.
package com.codeplayon.dagger.hilt.utils

enum class Status {
    SUCCESS,
    ERROR,
    LOADING
}
We require a class called Utility that is responsible for relay the current status in Network Call to the UI Layer. We’re naming it Resource. Thus, you need to create an Kotlin Data class Resource within this utils program, and include this code.
package com.codeplayon.dagger.hilt.utils

data class Resource<out T>(val status: Status, val data: T?, val message: String?) {

    companion object {

        fun <T> success(data: T?): Resource<T> {
            return Resource(Status.SUCCESS, data, null)
        }

        fun <T> error(msg: String, data: T?): Resource<T> {
            return Resource(Status.ERROR, data, msg)
        }

        fun <T> loading(data: T?): Resource<T> {
            return Resource(Status.LOADING, data, null)
        }

    }

}
Our utils package is up today.
Integrating Dagger Hilt
To set up Dagger within the project We would include this to Dagger’s build.gradle file.
implementation 'com.google.dagger:hilt-android:{latest-version}'
 kapt 'com.google.dagger:hilt-android-compiler:{latest-version}'
In the next step, we’ll install dagger.hilt as a dagger.hilt plugin at the top of the application’s build.gradle along with,
apply plugin: 'dagger.hilt.android.plugin'And finally, we’ll and finally, we will classespath in the build.gradle such as,
classpath "com.google.dagger:hilt-android-gradle-plugin:{latest-version}"This is the required setup to get started to use Dagger-Hilt in the project.
The Dagger Hilt system is set up
We will break up the making of the dagger hilt the project into steps.
Step 1.
We’ll first update Our Application Class Application as,
class App : Application()and we’ll make changes to the Manifest file , for example.
android:name=".App"To begin working with Dagger it is necessary to mark the class used by the application with the @HiltAndroidApp. The code that is updated will appear as follows:
@HiltAndroidApp class App : Application()If you plan to incorporate Dagger-Hilt into your app, this referenced step is a required one. It creates all components that we have to manually create when making use of Dagger.
Step: 2.
In the next step, we’ll include the dependencies for Retrofit as well as Kotlin-Coroutines within the application’s build.gradle such as,
// Networking
implementation "com.squareup.retrofit2:converter-moshi:2.6.2"
implementation "com.squareup.retrofit2:retrofit:2.8.1"
implementation "com.squareup.okhttp3:okhttp:4.7.2"
implementation "com.squareup.okhttp3:logging-interceptor:4.7.2"

//Coroutine
implementation "org.jetbrains.kotlinx:kotlinx-coroutines-android:1.3.6"
implementation "org.jetbrains.kotlinx:kotlinx-coroutines-core:1.3.6"
In the current project, what we’ll do is to make an API call, and then show an overview of the users. We will also make use of Kotlin-Coroutine to support multithreading.
In the next step, we’ll develop API, model, repositorypackages inside the data layer. The data layer will contain files such as,
And, ApiService looks like,
package com.codeplayon.dagger.hilt.data.api

import com.codeplayon.dagger.hilt.data.model.User
import retrofit2.Response
import retrofit2.http.GET

interface ApiService {

    @GET("users")
    suspend fun getUsers(): Response<List<User>>

}
ApiHelper looks like,
package com.codeplayon.dagger.hilt.data.api

import com.codeplayon.dagger.hilt.data.model.User
import retrofit2.Response

interface ApiHelper {

    suspend fun getUsers(): Response<List<User>>
}
and then, finally and finally, and finally, in ApiHelperImpl we and finally, inject ApiService into the constructor by using @Inject and then implement ApiHelper.
package com.codeplayon.dagger.hilt.data.api

import com.codeplayon.dagger.hilt.data.model.User
import retrofit2.Response
import javax.inject.Inject

class ApiHelperImpl @Inject constructor(private val apiService: ApiService) : ApiHelper {

    override suspend fun getUsers(): Response<List<User>> = apiService.getUsers()

}
Here, @Inject is helping in passing the dependency required by ApiHelperImpl in the constructor itself.
The User data class looks like,
package com.codeplayon.dagger.hilt.data.model

import com.squareup.moshi.Json


data class User(
    @Json(name = "id")
    val id: Int = 0,
    @Json(name = "name")
    val name: String = "",
    @Json(name = "email")
    val email: String = "",
    @Json(name = "avatar")
    val avatar: String = ""
)
and then and finally, and finally, in MainRepository, we’ll use ApiHelper to builder for the repository. MainRepository is what it looks like
package com.codeplayon.dagger.hilt.data.repository

import com.codeplayon.dagger.hilt.data.api.ApiHelper
import javax.inject.Inject

class MainRepository @Inject constructor(private val apiHelper: ApiHelper) {

    suspend fun getUsers() =  apiHelper.getUsers()

}
If you look at the code, you will see, we have completed ApiHelper and ApiService in MainRepository and ApiHelperImpl respectively. To inject everything into the constructor, we need to also supply it with the @Provide annotations in Dagger.
Step 3.
We will now create an application di and module inside which we will create an ApplicationModule. As you can see , we don’t need to create an ApplicationComponent since we’ll use the one supplied by Dagger-Hilt its own.
We will make an application class ApplicationModule and mark it with @Module. By using this annotation, dagger know the class as an application module.
@Module class ApplicationModule { }
We will now need to connect this module class into the appropriate component. In this scenario it is necessary to do this on the application level, so we’ll install it into an ApplicationComponent such as,
@Module @InstallIn(ApplicationComponent::class)
 class ApplicationModule {}
Here, you can see that we have used @InstallIn annotation to install it in ApplicationComponent. ApplicationComponent is supplied by Dagger-Hilt.
This means that the dependencies described are used throughout the entire application. Let’s say we want to implement the module at the level that we install the module,
@InstallIn(ActivityComponent::class)
Similarly like ApplicationComponent/ActivityComponent, we have a different type of components like,
FragmentComponent for Fragments, ServiceComponent for Service, etc.
Step 4.
In ApplicationModule we will supply all dependencies one by one, and then the latest code of the ApplicationModule class appears to be,
package com.codeplayon.dagger.hilt.di.module

import com.codeplayon.dagger.hilt.BuildConfig
import com.codeplayon.dagger.hilt.data.api.ApiHelper
import com.codeplayon.dagger.hilt.data.api.ApiHelperImpl
import com.codeplayon.dagger.hilt.data.api.ApiService
import dagger.Module
import dagger.Provides
import okhttp3.OkHttpClient
import okhttp3.logging.HttpLoggingInterceptor
import retrofit2.Retrofit
import javax.inject.Singleton
import dagger.hilt.InstallIn
import dagger.hilt.android.components.ApplicationComponent
import retrofit2.converter.moshi.MoshiConverterFactory

@Module
@InstallIn(ApplicationComponent::class)
class ApplicationModule {

    @Provides
    fun provideBaseUrl() = BuildConfig.BASE_URL

    @Provides
    @Singleton
    fun provideOkHttpClient() = if (BuildConfig.DEBUG) {
        val loggingInterceptor = HttpLoggingInterceptor()
        loggingInterceptor.setLevel(HttpLoggingInterceptor.Level.BODY)
        OkHttpClient.Builder()
            .addInterceptor(loggingInterceptor)
            .build()
    } else OkHttpClient
        .Builder()
        .build()


    @Provides
    @Singleton
    fun provideRetrofit(
        okHttpClient: OkHttpClient,
        BASE_URL: String
    ): Retrofit =
        Retrofit.Builder()
            .addConverterFactory(MoshiConverterFactory.create())
            .baseUrl(BASE_URL)
            .client(okHttpClient)
            .build()

    @Provides
    @Singleton
    fun provideApiService(retrofit: Retrofit): ApiService = retrofit.create(ApiService::class.java)

    @Provides
    @Singleton
    fun provideApiHelper(apiHelper: ApiHelperImpl): ApiHelper = apiHelper

}
We have created dependencies with the @Provide annotations. These could be available across the entire application.
@Singleton annotation allows for in creating an instance which can then be then used in the same app.
In the next step, if you’re remembering in the previous step, we had passed ApiHelper along with ApiService in MainRepository and ApiHelperImpl respectively for injecting it, we have to include these two dependencies.
In ApplicationModule the two last functions i.e. offerApiService as well as provideApiHelper are responsible for providing the instance that is ApiService and ApiHelper.
In addition for BASE_URL We will include this in the defaultConfig block of the application’s build.gradle file.
Step 5.
Once everything is set, we must use them or inject them into our Android classes. In our case, we will need our application to be able to use the classes.
To make any Android class compatible with Dagger-Hilt we employ,
@AndroidEntryPoint
In the code we create a second package called ui and within it, create a second sub-package called main that will contain MainActivity, MainViewModel, and MainAdapter to display the users’ names.
In the next step, we’ll include to the AndroidEntryPoint Annotation to MainActivity such as,
This is the case, @AndroidEntryPointmeans Dagger-Hilt can now inject dependencies into this class.
@AndroidEntryPoint annotations can be utilized in,
- Activity
- Fragment
- View
- Service
- BroadcastReceiver
Step 06.
The MainActivity will look like,
package com.codeplayon.dagger.hilt.ui.main.view

import android.os.Bundle
import android.view.View
import android.widget.Toast
import androidx.activity.viewModels
import androidx.appcompat.app.AppCompatActivity
import androidx.lifecycle.Observer
import androidx.recyclerview.widget.DividerItemDecoration
import androidx.recyclerview.widget.LinearLayoutManager
import com.codeplayon.dagger.hilt.R
import com.codeplayon.dagger.hilt.data.model.User
import com.codeplayon.dagger.hilt.ui.main.adapter.MainAdapter
import com.codeplayon.dagger.hilt.ui.main.viewmodel.MainViewModel
import com.codeplayon.dagger.hilt.utils.Status
import dagger.hilt.android.AndroidEntryPoint
import kotlinx.android.synthetic.main.activity_main.*

@AndroidEntryPoint
class MainActivity : AppCompatActivity() {

    private val mainViewModel : MainViewModel by viewModels()
    private lateinit var adapter: MainAdapter

    override fun onCreate(savedInstanceState: Bundle?) {
        super.onCreate(savedInstanceState)
        setContentView(R.layout.activity_main)
        setupUI()
        setupObserver()

    }

    private fun setupUI() {
        recyclerView.layoutManager = LinearLayoutManager(this)
        adapter = MainAdapter(arrayListOf())
        recyclerView.addItemDecoration(
            DividerItemDecoration(
                recyclerView.context,
                (recyclerView.layoutManager as LinearLayoutManager).orientation
            )
        )
        recyclerView.adapter = adapter
    }

    private fun setupObserver() {
        mainViewModel.users.observe(this, Observer {
            when (it.status) {
                Status.SUCCESS -> {
                    progressBar.visibility = View.GONE
                    it.data?.let { users -> renderList(users) }
                    recyclerView.visibility = View.VISIBLE
                }
                Status.LOADING -> {
                    progressBar.visibility = View.VISIBLE
                    recyclerView.visibility = View.GONE
                }
                Status.ERROR -> {
                    //Handle Error
                    progressBar.visibility = View.GONE
                    Toast.makeText(this, it.message, Toast.LENGTH_LONG).show()
                }
            }
        })
    }

    private fun renderList(users: List<User>) {
        adapter.addData(users)
        adapter.notifyDataSetChanged()
    }
}
MainAdapter class looks like,
package com.codeplayon.dagger.hilt.ui.main.adapter

import android.view.LayoutInflater
import android.view.View
import android.view.ViewGroup
import androidx.recyclerview.widget.RecyclerView
import com.bumptech.glide.Glide
import com.codeplayon.dagger.hilt.R
import com.codeplayon.dagger.hilt.data.model.User
import kotlinx.android.synthetic.main.item_layout.view.*

class MainAdapter(
    private val users: ArrayList<User>
) : RecyclerView.Adapter<MainAdapter.DataViewHolder>() {

    class DataViewHolder(itemView: View) : RecyclerView.ViewHolder(itemView) {
        fun bind(user: User) {
            itemView.textViewUserName.text = user.name
            itemView.textViewUserEmail.text = user.email
            Glide.with(itemView.imageViewAvatar.context)
                .load(user.avatar)
                .into(itemView.imageViewAvatar)
        }
    }

    override fun onCreateViewHolder(parent: ViewGroup, viewType: Int) =
        DataViewHolder(
            LayoutInflater.from(parent.context).inflate(
                R.layout.item_layout, parent,
                false
            )
        )

    override fun getItemCount(): Int = users.size

    override fun onBindViewHolder(holder: DataViewHolder, position: Int) =
        holder.bind(users[position])

    fun addData(list: List<User>) {
        users.addAll(list)
    }
}
you can see MainViewModel being used to manage data changes.
Step 07.
Then pass the following in the constructor of ViewModel,
private val mainRepository: MainRepository
private val networkHelper: NetworkHelper
Now need to first create a NetworkHelper like,
package com.codeplayon.dagger.hilt.utils

import android.content.Context
import android.net.ConnectivityManager
import android.net.NetworkCapabilities
import android.os.Build
import dagger.hilt.android.qualifiers.ApplicationContext
import javax.inject.Inject
import javax.inject.Singleton

@Singleton
class NetworkHelper @Inject constructor(@ApplicationContext private val context: Context) {

    fun isNetworkConnected(): Boolean {
        var result = false
        val connectivityManager =
            context.getSystemService(Context.CONNECTIVITY_SERVICE) as ConnectivityManager
        if (Build.VERSION.SDK_INT >= Build.VERSION_CODES.M) {
            val networkCapabilities = connectivityManager.activeNetwork ?: return false
            val activeNetwork =
                connectivityManager.getNetworkCapabilities(networkCapabilities) ?: return false
            result = when {
                activeNetwork.hasTransport(NetworkCapabilities.TRANSPORT_WIFI) -> true
                activeNetwork.hasTransport(NetworkCapabilities.TRANSPORT_CELLULAR) -> true
                activeNetwork.hasTransport(NetworkCapabilities.TRANSPORT_ETHERNET) -> true
                else -> false
            }
        } else {
            connectivityManager.run {
                connectivityManager.activeNetworkInfo?.run {
                    result = when (type) {
                        ConnectivityManager.TYPE_WIFI -> true
                        ConnectivityManager.TYPE_MOBILE -> true
                        ConnectivityManager.TYPE_ETHERNET -> true
                        else -> false
                    }

                }
            }
        }

        return result
    }
}
You can see that we pass the context to the builder of NetworkHelper. We also note the context using @ApplicationContext this means this context we will employ will depend on what is the application's context for the app.
step 08.
As of now, we need to move NetworkHelper and MainRepository to MainViewModel. ViewModels aren’t directly supported by Dagger-Hilt. In order to integrate with Dagger-Hilt, we make use of Jetpack Extensions.
In the beginning, we must set up the dependencies in Gradle to allow Jetpack extensions.
We can add this to the app’s build.gradle for example,
implementation 'androidx.hilt:hilt-lifecycle-viewmodel:' kapt 'androidx.hilt:hilt-compiler:'To support the kapt platform, we’ll add the plugin to support Kapt in the following way in the app’s build.gradle,
Apply plugin 'kotlin Kapt'To forward NetworkHelper as well as MainRepository we don’t need to make use of ViewModelFactory here, but instead send them both and make use of the @ViewModelInject annotation such as,
package com.codeplayon.dagger.hilt.ui.main.viewmodel

import androidx.hilt.lifecycle.ViewModelInject
import androidx.lifecycle.*
import com.codeplayon.dagger.hilt.data.model.User
import com.codeplayon.dagger.hilt.data.repository.MainRepository
import com.codeplayon.dagger.hilt.utils.NetworkHelper
import com.codeplayon.dagger.hilt.utils.Resource
import kotlinx.coroutines.launch

class MainViewModel @ViewModelInject constructor(
    private val mainRepository: MainRepository,
    private val networkHelper: NetworkHelper
) : ViewModel() {

    private val _users = MutableLiveData<Resource<List<User>>>()
    val users: LiveData<Resource<List<User>>>
        get() = _users

    init {
        fetchUsers()
    }

    private fun fetchUsers() {
        viewModelScope.launch {
            _users.postValue(Resource.loading(null))
            if (networkHelper.isNetworkConnected()) {
                mainRepository.getUsers().let {
                    if (it.isSuccessful) {
                        _users.postValue(Resource.success(it.body()))
                    } else _users.postValue(Resource.error(it.errorBody().toString(), null))
                }
            } else _users.postValue(Resource.error("No internet connection", null))
        }
    }
}
In this example, we’re retrieving users from the init block. In the viewModelScope we’ll look for internet connectivity and if it is fine, we will go to the API call, or change that value for LiveData and get an error.
The user’s LiveData is then monitored by the MainActivity and displayed to show the items of the recyclerView.
If you look at the above procedure, we create the instance of a ViewModel by calling viewModels(). viewModels()
As an additional step, include the following permissions in your Manifest file.
We are now completed configuring the project. when you launch the project, you’ll notice the list of users appearing by the recyclerView.
WorkManger and Dagger-Hilt
What can we do to collaborate with Dagger Hilt android and WorkManager?
If we’re using WorkManger using @WorkerInject, we can use it to add dependency into the constructor by using Jetpack Extensions.
Also, we need to add the following dependency to WorkManager,
implementation 'androidx.hilt:hilt-work:{latest-version}'
Qualifiers
Take a look at an example in which we have two functions providing strings with values. While providing them via Dagger How does dagger be able to determine which class requires which string value , since both belong to the same kind.
To resolve this problem, we utilize Qualifiers inside Dagger.
Take a look at an example in which we need to supply two distinct strings, one to provide an API key and another for API key, and the other to initiate a library’s initialization, such as,
@Provides
@Singleton
fun provideApiKey() = "My ApiKey"

@Provides
@Singleton
fun provideLibraryKey() = "My Library Key"
Now, in ApplicationModule, we will update both the providers for the key by attaching the annotation we just created like,
For the purpose of defining an qualifier, we’ll make the file with the named qualifier.kt within the di package and then update the file with the following format:
@Qualifier
@Retention(AnnotationRetention.BINARY)
annotation class ApiKey
@Qualifier
 @Retention(AnnotationRetention.BINARY)
 annotation class LibraryKey
We have made two annotations: ApiKey along with LibraryKey which are both designated with the designation @Qualifier.
These annotations will allow us differentiate between the methods used to implement ApiKey in addition to LibraryKey.
In ApplicationModule we will modify both providers to that key and attach the annotation that we just created,
Read More Tutorial