flutter bottom navigation bar example. Hi, developer in these flutter articles I. am working on making a flutter bottom navigation bar for a UI design for Android and iOS app both of the app.
In this bottom Navi bar flutter tutorial, we learn how to set up a new Flutter app with a bottom Navi bar working. Flutter is gaining popularity in the mobile space due to cross-platform both for android and iOS. Flutter is unique for these tool because it doesn’t require using platform native widgets or WebViews. The main drawback of adopting Flutter right now is the lack of third party support and solutions. However, Flutter is a promising tool for writing great looking for android and iOS apps without having to sacrifice performance.
Let’s Start on Example flutter bottom navigation bar.
Step: 1 start your Android studio and Create your flutter app.
let’s start your android studio and create your application with a flutter application. and after that open your main.dart file and delete all code in your main.dart file and add these code in your main. dart file. in these main. dart file first of import you’re home_widget file because in this file I design our bottom menu bar.
import "package:flutter/material.dart";
import 'home_widget.dart';


void main() => runApp(App());

class App extends StatelessWidget {
  @override
  Widget build(BuildContext context) {
    return MaterialApp(
      title: 'My Flutter App',
      home: Home(),
    );
  }

}
Step 2: Create a home_widget. dart file and add these codes.
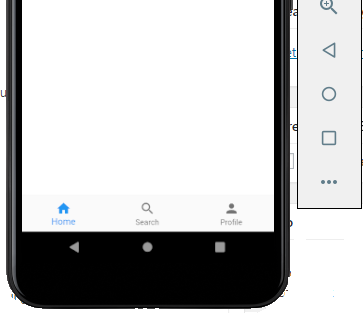
in these home_widget.dart file, we design our bottom navigation bar and adding a button. for bottom navigation in flutter using bottomNavigationBar and after that set the child item of the BottomNavigationBarItem. and click on an item the call onTabTapped method for control-click on tab.
import 'package:flutter/material.dart';
import 'PlaceholderWidget.dart';

class Home extends StatefulWidget {
  @override
  State<StatefulWidget> createState() {
    return _HomeState();
  }
}

class _HomeState extends State<Home> {
  int _currentIndex = 0;
  final List<Widget> _children = [
    PlaceholderWidget(Colors.white),
    PlaceholderWidget(Colors.deepOrange),
    PlaceholderWidget(Colors.green)
  ];

  @override
  Widget build(BuildContext context) {
    return Scaffold(
      appBar: AppBar(
        title: Text('Flutter Bottem Navi '),
      ),
      body: _children[_currentIndex],
      bottomNavigationBar: BottomNavigationBar(
        onTap: onTabTapped,
        currentIndex: _currentIndex,
        items: [
          BottomNavigationBarItem(
            icon: Icon(Icons.home),
            title: Text('Home'),
          ),
          BottomNavigationBarItem(
            icon: Icon(Icons.search),
            title: Text('Search'),
          ),
          BottomNavigationBarItem(
              icon: Icon(Icons.person),
              title: Text('Profile')
          )
        ],
      ),
    );
  }

  void onTabTapped(int index) {
    setState(() {
      _currentIndex = index;
    });
  }
}
Step 3: make a PlaceholderWidget dart file and add this code.
import 'package:flutter/material.dart';

class PlaceholderWidget extends StatelessWidget {
  final Color color;

  PlaceholderWidget(this.color);

  @override
  Widget build(BuildContext context) {
    return Container(
      color: color,
    );
  }
}
that fine and run your app for results.