what is a splash screen
Splash screen is the first screen of your App to interact with to the user. It is typically utilized to greet the user as the app loads initial information. The screen is usually adorned with the logo of the app and/or its name. The purpose of this post is to show we’ll make a splash screen iOS using SwiftUI tutorial .
So Let’s start to Create your iOS project and create a swift class with the name splash_screen and follow the bellow code snip. Also I am using Animation on the screen where i animate a image and text on the screen. after a seconds screen move on next screen.
How to make a splash screen in Swift UI – iOS
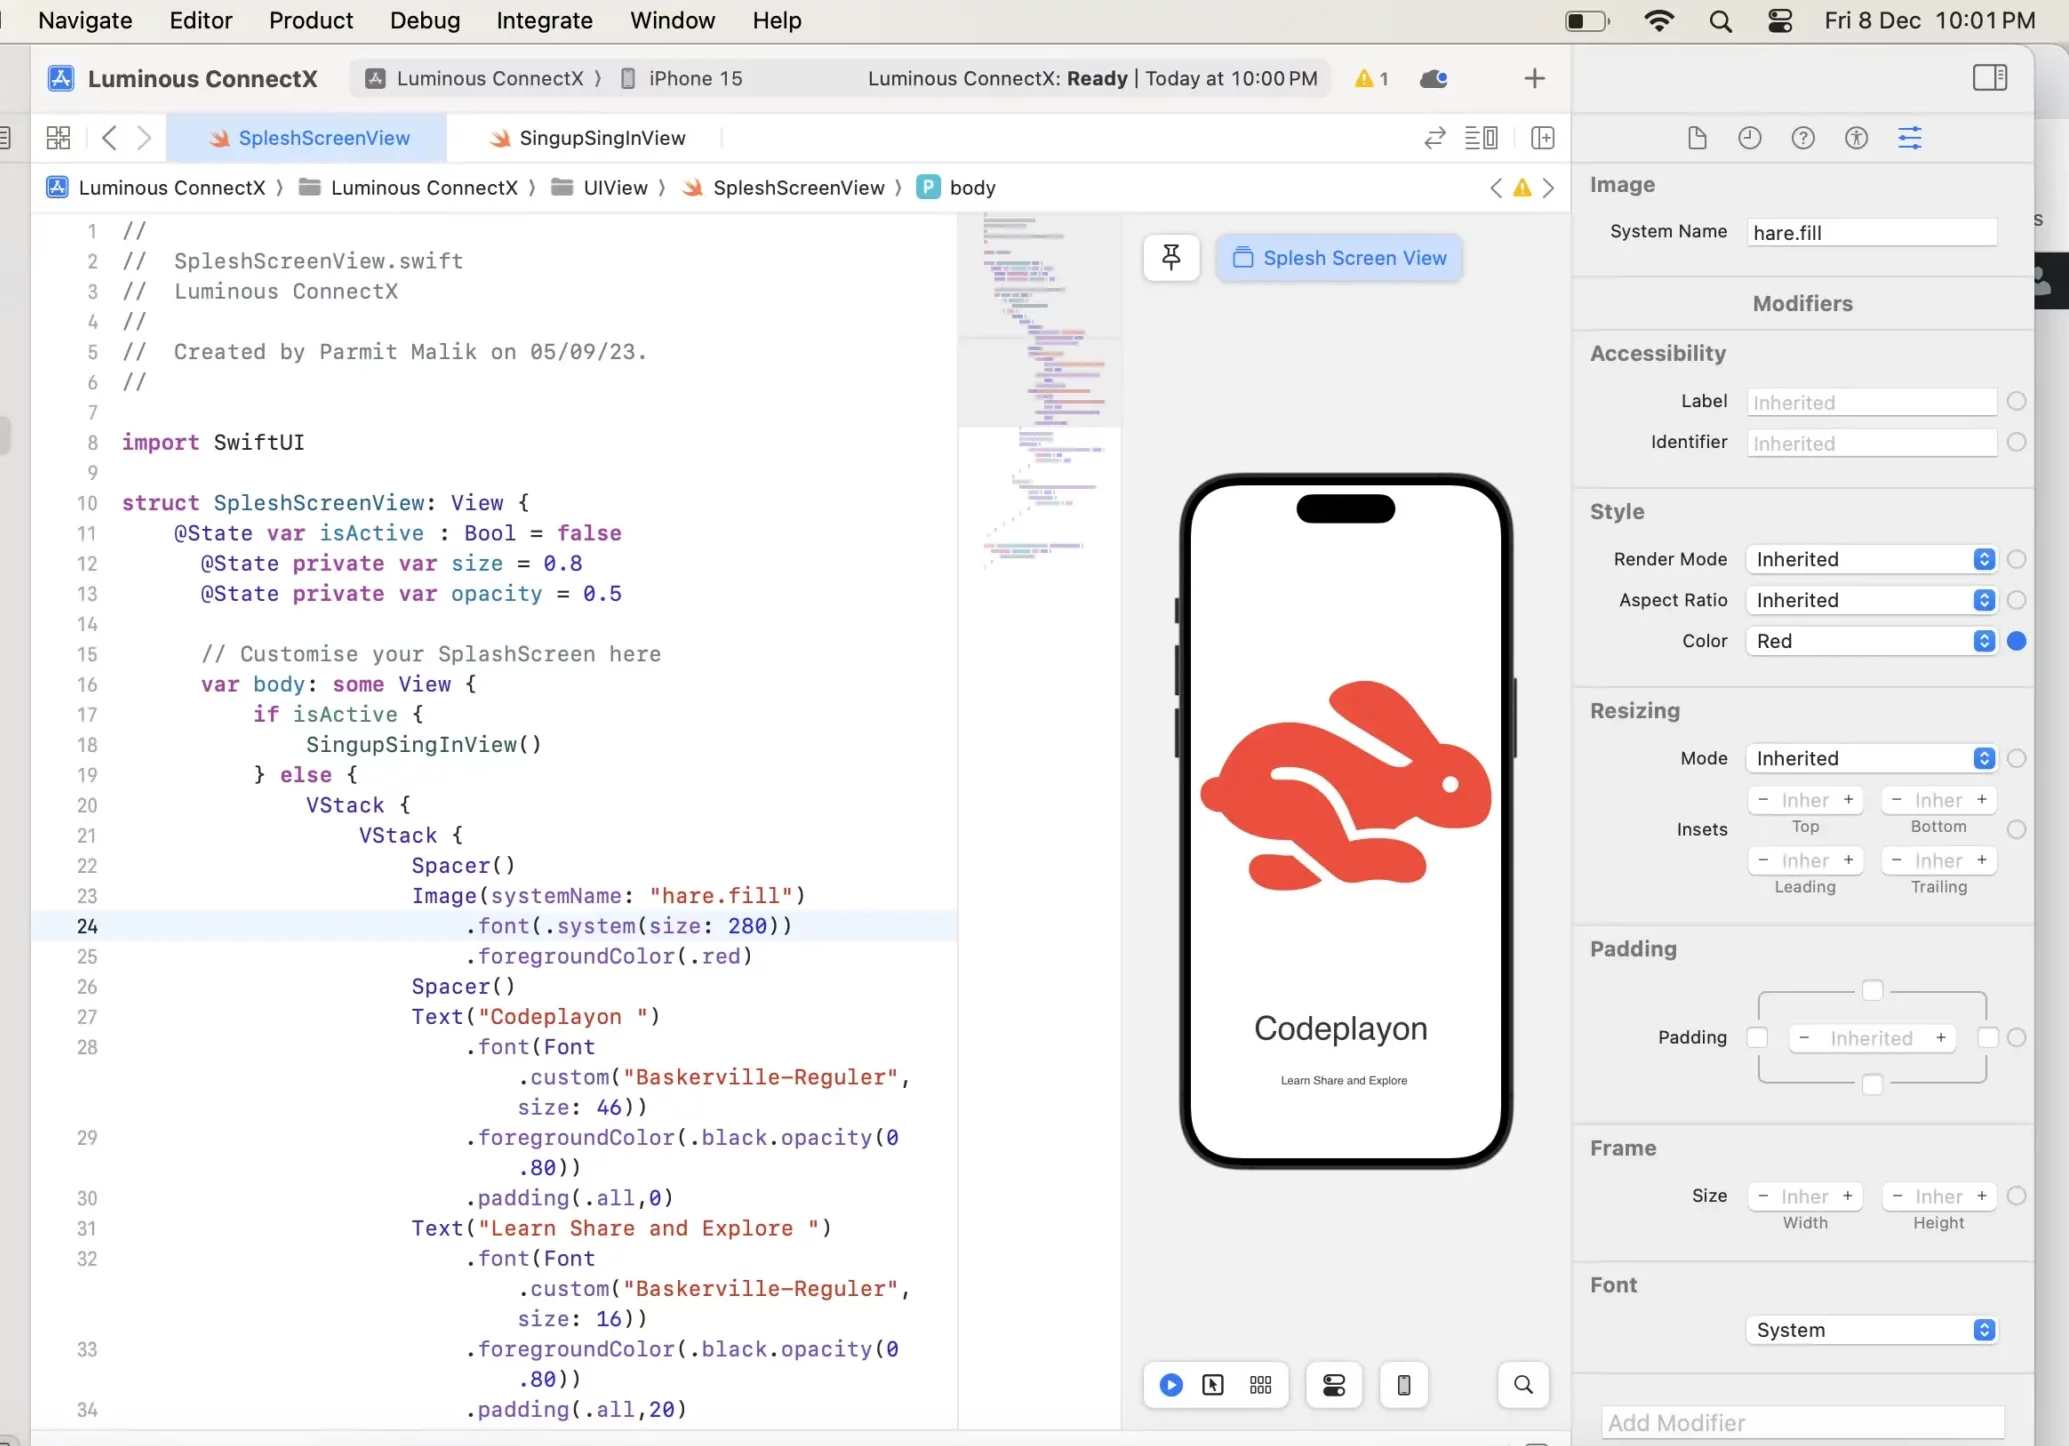
var body: some View {

          if isActive {

              SingupSingInView()

          } else {

              VStack {

                  VStack {

                      Spacer()

                      Image(systemName: "hare.fill")

                          .font(.system(size: 280))

                          .foregroundColor(.red)

                      Spacer()

                      Text("Codeplayon ")

                          .font(Font.custom("Baskerville-Reguler", size: 46))

                          .foregroundColor(.black.opacity(0.80))

                  }

                  .scaleEffect(size)

                  .opacity(opacity)

                  .onAppear {

                      withAnimation(.easeIn(duration: 1.2)) {

                          self.size = 0.9

                          self.opacity = 1.00

                      }

                  }

              }
Here i have used a isActive boolean value that we are binding However, the isActive boolean basically controls which view to show. If isActive is False then SplashScreen will be shown, and as soon as it becomes True we will show the SingupSingInView.
splash screen ios swift tutorial Source code.
import SwiftUI

struct SpleshScreenView: View {

    @State var isActive : Bool = false

      @State private var size = 0.8

      @State private var opacity = 0.5


      // Customise your SplashScreen here

      var body: some View {

          if isActive {

              SingupSingInView()

          } else {

              VStack {

                  VStack {

                      Spacer()

                      Image(systemName: "hare.fill")

                          .font(.system(size: 80))

                          .foregroundColor(.red)

                      Spacer()

                      Text("Codeplayon ")

                          .font(Font.custom("Baskerville-Reguler", size: 46))

                          .foregroundColor(.black.opacity(0.80))

                          .padding(.all,0)

                      Text("Learn Share and Explore ")

                          .font(Font.custom("Baskerville-Reguler", size: 16))

                          .foregroundColor(.black.opacity(0.80))

                          .padding(.all,20)

                  }

                  .scaleEffect(size)

                  .opacity(opacity)

                  .onAppear {

                      withAnimation(.easeIn(duration: 1.2)) {

                          self.size = 0.9

                          self.opacity = 1.00

                      }

                  }

              }

              .onAppear {

                  DispatchQueue.main.asyncAfter(deadline: .now() + 2.0) {

                      withAnimation {

                          self.isActive = true

                      }

                  }

              }

          }

      }

  }

struct SpleshScreenView_Previews: PreviewProvider {

    static var previews: some View {

        SpleshScreenView()

    }

}
Also Create a SingupSingInView swift class for show next screen after splash screen. like the login screen singin singup screen. As per your UI requirements your can add your screen hare i am add a iOS login screen.
Read More Tutorial
- Codeplayon Jetpack Compose Tutorial
- Codeplayon Android Tutorial
- Codeplayon Flutter Tutorial
- Codeplayon on Github