A Simple App with Android Jetpack Compose
Hi, developer in the android Jetpack Compose example we are creating A Simple App using Android Jetpack Compose. So In the Advance android learn for development and advanced tech for making a great UI in android. Android Jetpack Compose is a modern toolkit for building native Android UI Without XML coding. Jetpack Compose provides a simple and accurate UI for Android development with less code & powerful tools with Kotlin APIs.
Android Compose functions
Jetpack Compose is built around composable functions. These composable functions define your app’s UI programmatically and describe how it should provide look and data dependencies. Rather than you are focus on the UI’s process that construction (initialize an element and attach it to a parent, etc.). To create a composable function, just adding with @Composable function name.
Let’s start to make your first app using jetpack compose. So that start your android fix studio and make a composed application. if you and not set up you can follow the previse example for Jetpack compose setup.
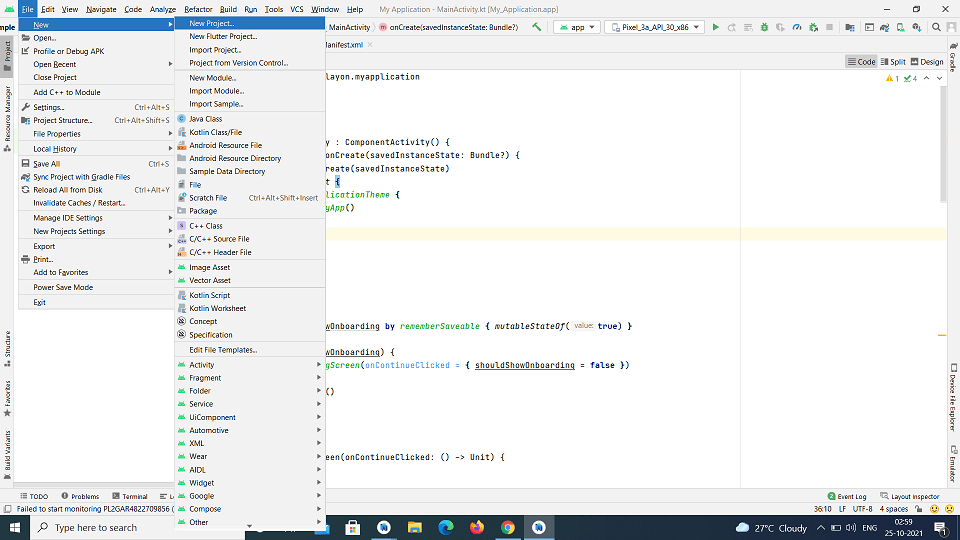
Step 1: – Start Your Android Fix the latest version and Click On File ==> New Project ==> Select Empty Compose Activity.
Start android studio and create a new project click on file new project and select an Empty Compose activity and build your project. in your package folder, you can the main activity kotlin file.
Add a text element
Firstly you can download the most recent android stuion version of Arctic Fox. And let’s make a simple app using the Empty Compose Activity template. These template already default some Compose elements, but you can build it up step by step.
First, we’ll display a “Hello world!” text by adding a text compose function inside the onCreate method. This is defining a content block and calling the Text() function. The setContent block defines the activity layout where we can call composable functions. Composable functions that you can used only and called from other composable functions.
Define a composable function
To make a composable function and add the @Composable annotation. To try this out, define a MessageCard() function that is passed a name, and use it to configure the text element.
Preview your function in Android Studio
The Android Studio provided you preview of your composable functions within the Android IDE. Instead of installing the app into your Android device and emulator. The composable function must provide a default value for any parameters. For that reason, you can’t preview the MessageCard() function directly to show the preview. Instead, you can make a second function with the name, which is called the MessageCard() with an appropriate parameter for showing the preview. Add an @Preview annotation before @Composable.
MainActivity Full Source code.
package com.codeplayon.simpleappusingwithjetpackcompose

import android.os.Bundle
import androidx.activity.ComponentActivity
import androidx.activity.compose.setContent
import androidx.compose.material.MaterialTheme
import androidx.compose.material.Surface
import androidx.compose.material.Text
import androidx.compose.runtime.Composable
import androidx.compose.ui.tooling.preview.Preview
import com.codeplayon.simpleappusingwithjetpackcompose.ui.theme.SimpleAppUsingWithJetpackComposeTheme

class MainActivity : ComponentActivity() {
    override fun onCreate(savedInstanceState: Bundle?) {
        super.onCreate(savedInstanceState)
        setContent {
            SimpleAppUsingWithJetpackComposeTheme {
                // A surface container the 'background' color from the theme
                Surface(color = MaterialTheme.colors.background) {
                    Greeting("Android")
                }
            }
        }
    }
}

@Composable
fun Greeting(name: String) {
    Text(text = "Hello $name!")
}

@Preview(showBackground = true)
@Composable
fun DefaultPreview() {
    SimpleAppUsingWithJetpackComposeTheme {
        Greeting("Android")
    }
}
you can file full source code on GitHub also Project in Github link


