Android Application Development Environment Setup
Android application development can be start on either of the following operating systems:
- Microsoft Windows XP or later version.
- Mac OS X 10.5.8 or later version with Intel chip.
- Linux including GNU C Library 2.7 or later.
Second point is that all the required tools to develop Android applications are freely available and can be downloaded from the Web. Following is the list of software’s you will need before you start your Android application programming.
- Java JDK5 or JDK6
- Android SDK
- Eclipse IDE for Java Developers (optional)
- Android Development Tools (ADT) Eclipse Plugin (optional)
Here last two components are optional and if you are working on Windows machine then these components make your life easy while doing Java based application development. So let us have a look at how to proceed to set the required environment.
Step 1 – Setup Java Development Kit (JDK)
You can download the latest version of Java JDK from Oracle’s Java site: http://www.oracle.com/technetwork/java/javase/downloads/index. You will find instructions for installing JDK in downloaded files, follow the given instructions to install and configure the setup. Finally, set PATH and JAVA_HOME environment variables to refer to the directory that contains java and javac, typically java_install_dir/bin and java_install_dir respectively.
If you are running Windows and have installed the JDK in C:\jdk1.6.0_15, you would have to put the following line in your C:\autoexec.bat file.
- set PATH=C:\jdk1.6.0_15\bin;%PATH%
- set JAVA_HOME=C:\jdk1.6.0_15
Alternatively, you could also right-click on My Computer, select Properties, then Advanced, then Environment Variables. Then, you would update the PATH value and press the OK button. On Linux, if the SDK is installed in /user/local/jdk1.6.0_15 and you use the C shell, you would put the following code into your .cshrc file.
- setenv PATH /usr/local/jdk1.6.0_15/bin:$PATH
- setenv JAVA_HOME /usr/local/jdk1.6.0_15
Step #2: Install Android Studio
Alternatively, if you use an Integrated Development Environment (IDE) Eclipse, then it will know automatically where you have installed your Java.
There are a few Android App developing tools that one can choose from. We are focusing here on Android Studio tool. Eclipse, another IDE, or no IDE at all for building Android apps. There are few download options.Get the latest shipping version of Android Studio from the Android Studio download page.

Windows users can download a self-installing EXE, which will add suitable launch options for you to be able to start the IDE. Mac users can download a DMG disk image and install it akin to other Mac software.
All users, including Linux users, can download a ZIP file, then unZIP it to some likely spot on your hard drive. Android Studio can then be run from the studio batch file or shell script from your Android Studio installation’s bin/ directory.
Step #3: Install the SDKs and Add-Ons
Next, it needs to review what pieces of the Android SDK it has already and perhaps install some new items. To do this, it needs to access the SDK Manager. When you first run Android Studio, you may be asked if you want to import settings from some other prior installation of Android Studio:
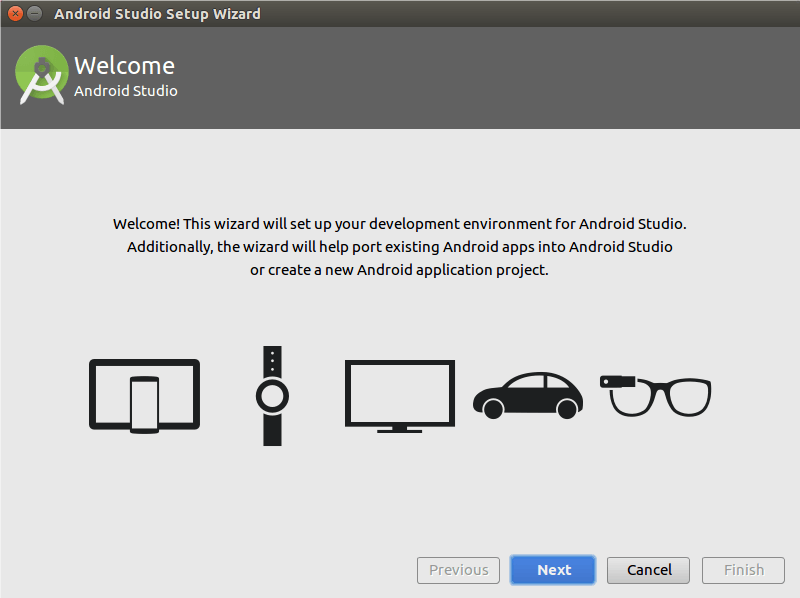
For most users, particularly those using Android Studio for the first time, the “I do not have…” option is the correct choice to make. Then, after a short splash screen, you will be taken to the Android Studio Setup Wizard:
click “Next” to advance to the second page of the wizard:
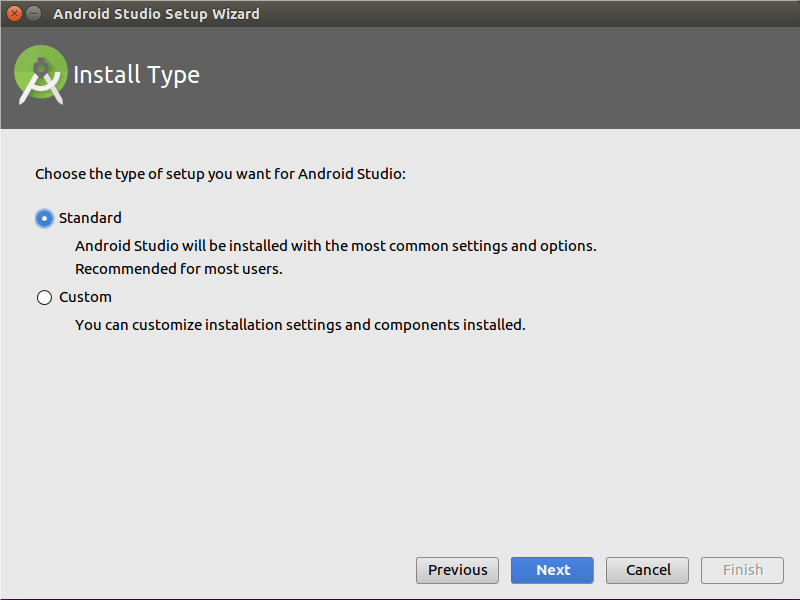
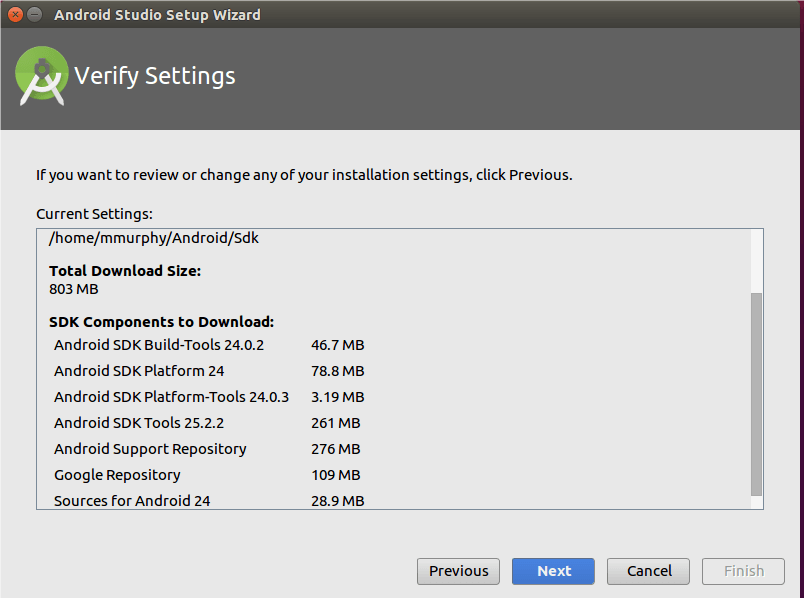
Here, it has a choice between “Standard” and “Custom” setup modes. Most likely, right now, the “Standard” route will be fine. Select “Standard” route and click “Next”, it should be taken to a wizard page to verify what will be downloaded and installed:
Clicking Next may take you to a wizard page explaining some information about the Android emulator:
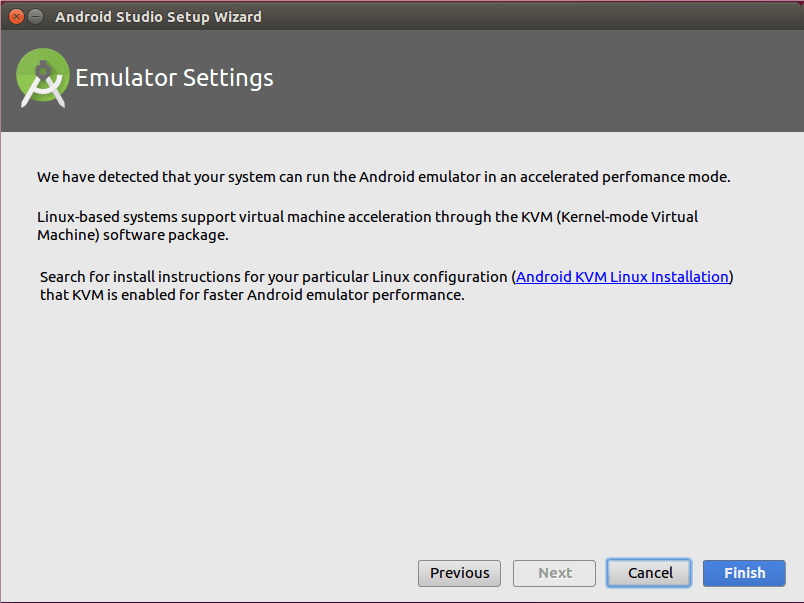
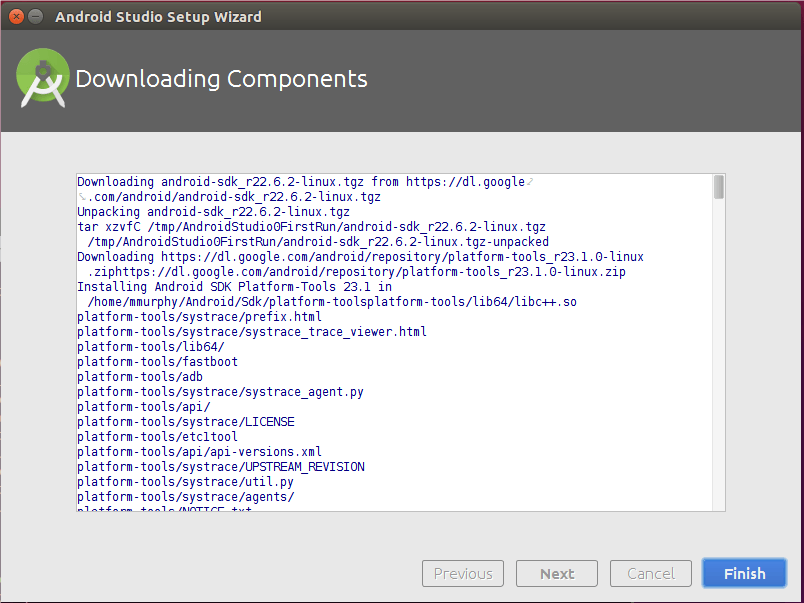
Just click “Finish” to begin the setup process. This will include downloading a copy of the Android SDK and installing it into a directory adjacent to where Android Studio itself is installed. If you are running Linux, and your installation crashes with an “Unable to run mksdcard SDK tool” error, go back to Step #2 and set up 32-bit support on your Linux environment. When that is done, after clicking “Finish”, Android Studio will busily start downloading stuff to your development machine. It may be presented with a results dialog when work is completed.
Clicking “Finish” will then take you to the Android Studio Welcome dialog:
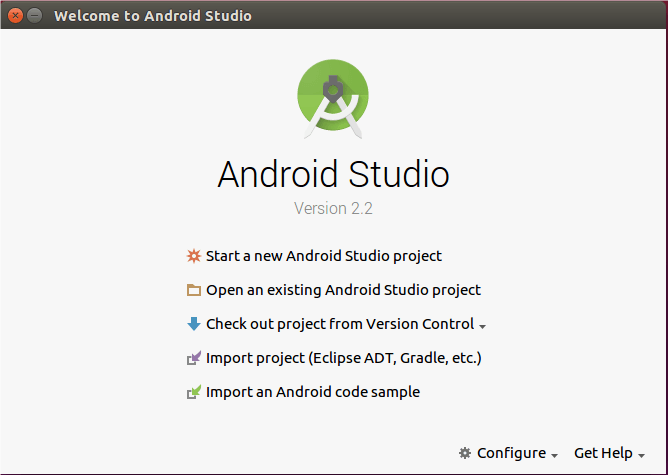
Then, in the welcome dialog, click Configure, to bring up a configuration drop-down list:
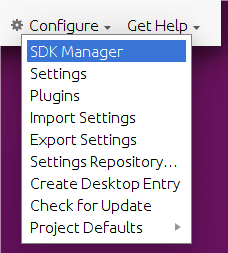
There, tap on SDK Manager to bring up the SDK Manager.
Using SDK Manager and Updating Your Environment
It should now have the SDK Manager open, as part of the overall default settings for Android Studio:
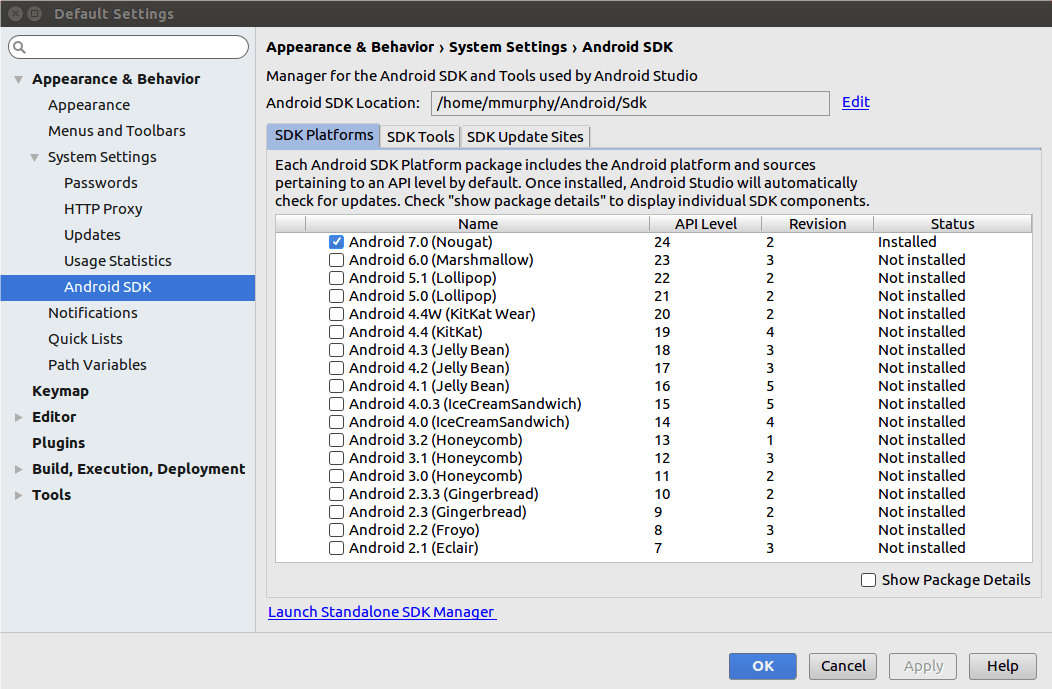
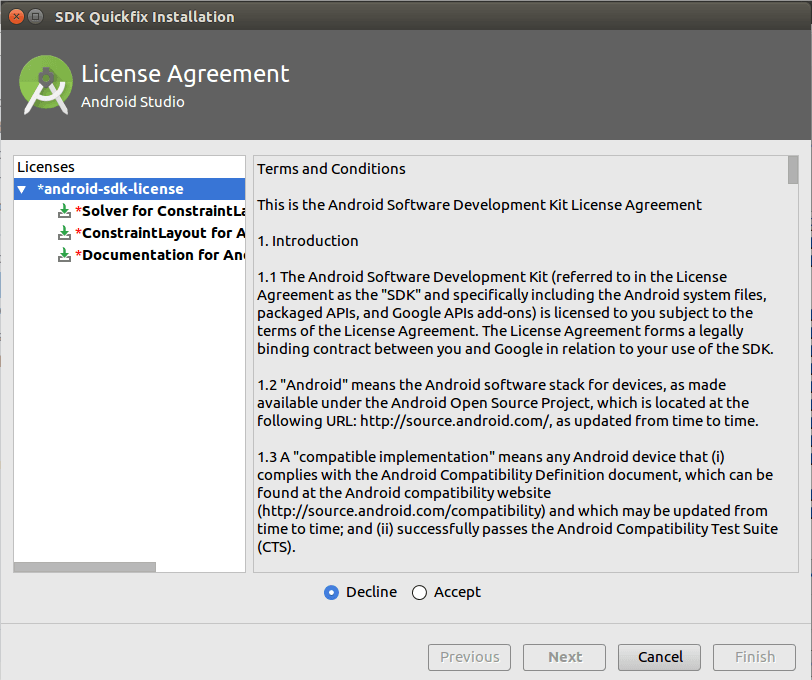
The “SDK Platforms” tab lists the versions of Android for compiling the application. The latest version of Android is usually installed when it set up Android Studio initially. However, for the tutorials, please also check “Android 7.0 (Nougat)” in the list if it is not already checked, and then click the “Apply” button to download and install those versions. You may need to accept a license confirmation dialog as part of this process:
When it is completed, click “Finish” to close up the download dialog, and then it will be returned to the SDK Manager. Click on the “SDK Tools” tab
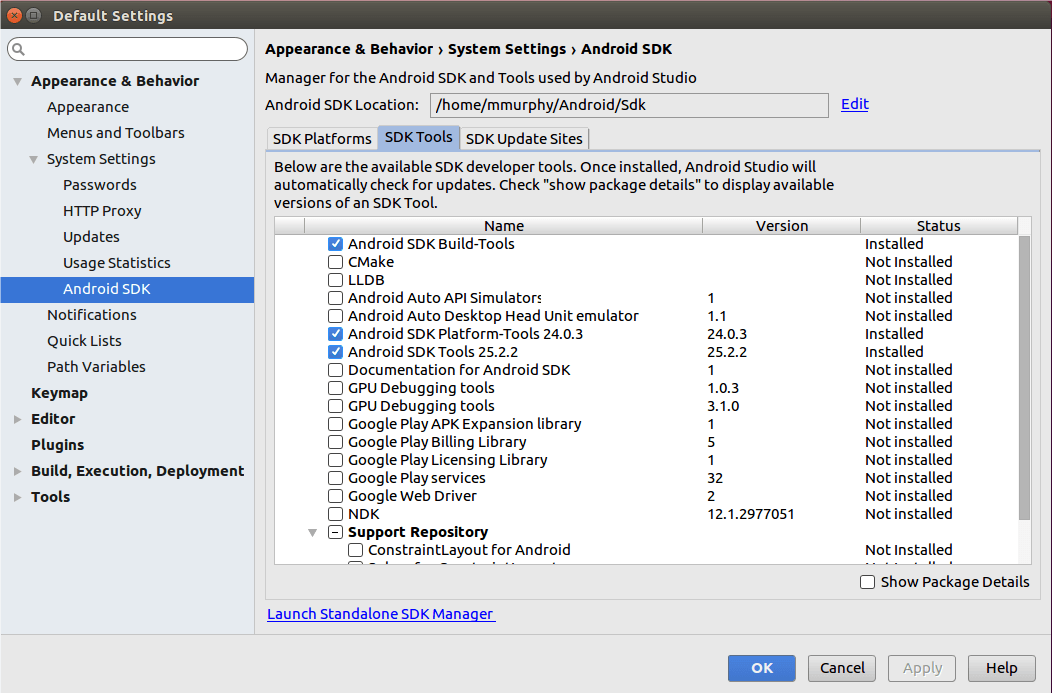
This lists tools and related materials for Android development, other than the emulator (which is set up and configured separately). Android Studio usually has the right set up of stuff checked and installed already for you. You may wish to install:
- “Documentation for Android SDK”, It contains an offline copy of most of the material found at http://developer.android.com
- Two ConstraintLayout items in the “Support Repository” category (“ConstraintLayout for Android” and “Solver for ConstraintLayout”)
Some items may be marked with a status indicating that an update is available, in which case user may wish to apply those updates. Items would be related to an outstanding developer preview of a new version of Android. While developer previews are useful, they add complexity for newcomers to Android. Once it is checked and unchecked the changes that are desired, click “Apply” to download the new things and remove the unwanted things. When done with the adjustments, close up the SDK Manager by clicking the OK button.