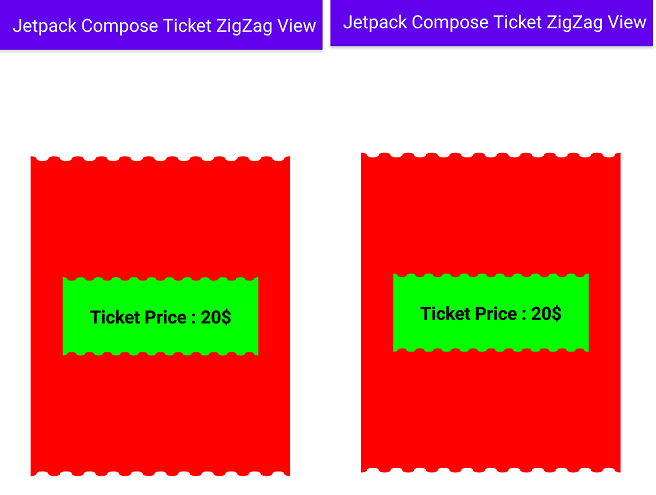
Hi, Android developer in this jetpack composes article I make a jetpack compose ticket zigzag view. Also, we learn in this article how to make a custom view in jetpack compose. So let’s start to make examples for Jetpack Compose Ticket ZigZag View.
n the Advance android learn for development and advanced tech for making a great UI in android. Android Jetpack Compose is a modern toolkit for building native Android UI Without XML coding. Jetpack Compose provides a simple and accurate UI for Android development with less code & powerful tools with Kotlin APIs.
Jetpack Compose is built around composable functions. These composable functions define your app’s UI programmatically and describe how it should provide look and data dependencies. Rather than you are focus on the UI’s process that construction (initialize an element and attach it to a parent, etc.).
Jetpack Compose Ticket ZigZag View Example Souce code
So let’s start to make an example So start your android studio and make a project with the Android jetpack Compose activity. And finish the step and wait for the successful build project. After the following steps.Jetpack Compose Ticket ZigZag View.
Add Dependencies in your module base Gradle Build.
dependencies {

    implementation 'androidx.core:core-ktx:1.7.0'
    implementation 'androidx.appcompat:appcompat:1.4.1'
    implementation 'com.google.android.material:material:1.5.0'
    implementation "androidx.compose.ui:ui:$compose_version"
    implementation "androidx.compose.material:material:$compose_version"
    implementation "androidx.compose.ui:ui-tooling-preview:$compose_version"
    implementation 'androidx.lifecycle:lifecycle-runtime-ktx:2.4.0'
    implementation 'androidx.activity:activity-compose:1.4.0'
    testImplementation 'junit:junit:4.+'
    androidTestImplementation 'androidx.test.ext:junit:1.1.3'
    androidTestImplementation 'androidx.test.espresso:espresso-core:3.4.0'
    androidTestImplementation "androidx.compose.ui:ui-test-junit4:$compose_version"
    debugImplementation "androidx.compose.ui:ui-tooling:$compose_version"
}
Make a Kotlin Class With the Name CustomShape.
class CustomShape(private val waveCount: Int = 10): Shape {
    override fun createOutline(
        size: Size,
        layoutDirection: LayoutDirection,
        density: Density
    ): Outline {
        return Outline.Generic(
            path = drawCustomPath(size, waveCount = waveCount)
        )
    }
}
Main Activity Source code.
In your main activity, you can make your zig zag view by calling CustomShape kotlin clas. With the help of CustomShape, we make a UI for Jetpack Compose Ticket ZigZag View. Ans Also set the tab bar ad its title. So let’s follow below source code and complete the zig-zag view example.
import android.os.Bundle
import androidx.activity.ComponentActivity
import androidx.activity.compose.setContent
import androidx.compose.foundation.background
import androidx.compose.foundation.layout.*
import androidx.compose.material.*
import androidx.compose.ui.Alignment
import androidx.compose.ui.Modifier
import androidx.compose.ui.geometry.Offset
import androidx.compose.ui.geometry.Rect
import androidx.compose.ui.geometry.Size
import androidx.compose.ui.graphics.Color
import androidx.compose.ui.graphics.Path
import androidx.compose.ui.text.font.FontWeight
import androidx.compose.ui.text.style.TextAlign
import androidx.compose.ui.unit.dp
import androidx.compose.ui.unit.sp

class MainActivity : ComponentActivity() {
    override fun onCreate(savedInstanceState: Bundle?) {
        super.onCreate(savedInstanceState)
        setContent {
            ZigZagShapeTheme {
                val shape = CustomShape()
                Surface(color = MaterialTheme.colors.background) {
                    Scaffold(
                        topBar = {
                            TopAppBar(
                                title = {
                                    Text(
                                        text = "Jetpack Compose Ticket ZigZag View",
                                        modifier = Modifier.fillMaxWidth(),
                                        textAlign = TextAlign.Left
                                    )
                                }
                            )
                        }
                    ) {
                        Column(
                            modifier = Modifier.fillMaxSize(),
                            horizontalAlignment = Alignment.CenterHorizontally,
                            verticalArrangement = Arrangement.Center
                        ) {
                            Card(
                                modifier = Modifier
                                    .fillMaxWidth(0.8f)
                                    .fillMaxHeight(0.6f),
                                shape = shape,
                                backgroundColor = Color.Red
                            ) {
                                Column(
                                    modifier = Modifier
                                        .wrapContentSize()
                                        .background(shape = shape, color = Color.Green),
                                    horizontalAlignment = Alignment.CenterHorizontally,
                                    verticalArrangement = Arrangement.Center
                                ) {
                                    Text(
                                        text = "Ticket Price : 20$",
                                        modifier = Modifier
                                            .padding(30.dp),
                                        color = Color.Black,
                                        fontSize = 20.sp,
                                        fontWeight = FontWeight.Bold
                                    )
                                }
                            }
                        }
                    }
                }
            }
        }
    }
}

fun drawCustomPath(size: Size, waveCount: Int): Path {
    val waveLength = size.width / (waveCount + 1)
    val waveHeight = waveLength / 5
    val gap = 3*waveLength/4
    return Path().apply {
        reset()
        moveTo(0f, 0f)
        arcTo(
            rect = Rect(topLeft = Offset(-waveLength/4, 0f),
                bottomRight = Offset(waveLength / 4, waveHeight)),
            startAngleDegrees = 270f,
            sweepAngleDegrees = 90f,
            forceMoveTo = false
        )
        arcTo(
            rect = Rect(topLeft = Offset(waveLength / 4, 0f),
                bottomRight = Offset(gap, waveHeight)),
            startAngleDegrees = 180f,
            sweepAngleDegrees = -180f,
            forceMoveTo = false
        )
        for (i in 1..waveCount) {
            arcTo(
                rect = Rect(topLeft = Offset(gap + waveLength * (i-1), 0f),
                    bottomRight = Offset(gap + waveLength * (i-1) + waveLength/2, waveHeight)),
                startAngleDegrees = 180f,
                sweepAngleDegrees = 180f,
                forceMoveTo = false
            )
            arcTo(
                rect = Rect(topLeft = Offset(gap + waveLength * (i-1) + waveLength/2, 0f),
                    bottomRight = Offset(gap + waveLength * i, waveHeight)),
                startAngleDegrees = 180f,
                sweepAngleDegrees = -180f,
                forceMoveTo = false
            )
        }
        arcTo(
            rect = Rect(topLeft = Offset(size.width - waveLength/4, 0f),
                bottomRight = Offset(size.width + waveLength/4, waveHeight)),
            startAngleDegrees = 180f,
            sweepAngleDegrees = 90f,
            forceMoveTo = false
        )
        lineTo(size.width, size.height)
        arcTo(
            rect = Rect(
                topLeft = Offset(size.width - waveLength/4, size.height - waveHeight),
                bottomRight = Offset(size.width + waveLength/4, size.height)),
            startAngleDegrees = 90f,
            sweepAngleDegrees = 90f,
            forceMoveTo = false
        )
        arcTo(
            rect = Rect(
                topLeft = Offset(size.width - gap,
                    size.height - waveHeight),
                bottomRight = Offset(size.width - waveLength/4, size.height)),
            startAngleDegrees = 0f,
            sweepAngleDegrees = -180f,
            forceMoveTo = false
        )
        for (i in 1..waveCount) {
            arcTo(rect = Rect(
                topLeft = Offset(size.width - gap - waveLength*(i-1) - waveLength/2,
                    size.height - waveHeight),
                bottomRight = Offset(size.width - gap - waveLength*(i-1),
                    size.height)),
                startAngleDegrees = 0f,
                sweepAngleDegrees = 180f,
                forceMoveTo = false
            )
            arcTo(
                rect = Rect(
                    topLeft = Offset(size.width - gap - waveLength * i,
                        size.height - waveHeight),
                    bottomRight = Offset(size.width - gap - waveLength*(i-1) - waveLength/2,
                        size.height)),
                startAngleDegrees = 0f,
                sweepAngleDegrees = -180f,
                forceMoveTo = false
            )
        }
        arcTo(
            rect = Rect(topLeft = Offset(-waveLength/4, size.height - waveHeight),
                bottomRight = Offset(waveLength/4, size.height)),
            startAngleDegrees = 0f,
            sweepAngleDegrees = 90f,
            forceMoveTo = false
        )
        close()
    }
}
After adding these codes build your project and run Jetpack Compose Ticket ZigZag View it for testing.
Read More Tutorial